Setup File Upload
Estimated time to read: 4 minutes
Now that we have our Storage Bucket. Lets implement file upload functionality for our Post images.
There are two ways to implement file upload in Amplify Gen 2:
- using the
uploadDatahook - using the
FileUploaderUI component
Using uploadData
Add these imports at the top of Posts.tsx:
// src/components/Posts.tsx

import { uploadData } from 'aws-amplify/storage'
import { fetchAuthSession } from 'aws-amplify/auth';
What this does:
uploadDatahandles file uploads to S3 storagefetchAuthSessiongets the user's identity
Modify createPost by replacing it with the code below:
// src/components/Posts.tsx

const createPost = async () => {
  const session = await fetchAuthSession();
  const identityId = session.identityId;

  const fileInput = document.createElement('input');
  fileInput.type = 'file';
  fileInput.accept = 'image/*';

  fileInput.onchange = async (e) => {
    const file = (e.target as HTMLInputElement).files?.[0];
    if (!file) return

    const path = `post-pictures/${identityId}/${Date.now()}-${file.name}`;
    uploadData({ path, data: file });

    const caption = window.prompt("Caption");
    if (!caption) return;

    const newPost = await client.models.Post.create({
      caption,
      email: user.signInDetails?.loginId,
      userId: user.userId,
      date: new Date().toLocaleString(),
      imagePath: path,
    })

    console.log("Create Post Result: ", newPost)
  };

  fileInput.click();  // Automatically opens up file input modal
}
Let's break down the code above and explain each section:
Get User Identity
const session = await fetchAuthSession();
const identityId = session.identityId;
- Gets the authenticated user's unique Cognito Identity ID
- Used to create user-specific file paths for security
File Selection
const fileInput = document.createElement('input');
fileInput.type = 'file';
fileInput.accept = 'image/*';
- Creates a hidden file input element
- Restricts selection to image files only
Upload & Save
path = `post-pictures/${identityId}/${Date.now()}-${file.name}`;
uploadData({ path, data: file });
- Creates unique file path with timestamp to prevent conflicts
- Organizes files by user identity for security
- Uploads file to S3, specifically in the specified storage bucket
path
Store Path
imagePath: path,
- Saves the file path in DynamoDB for later retrieval
- Path will be used to display our images later
Using FileUploader
The uploadData is great to use especially if you want full control. But if you want an easier way to just quickly upload your files, you can use Amplify's FileUploader UI component.
So undo everything from the top
Install the library below
npm install @aws-amplify/ui-react-storage aws-amplify
Import it on the top of your Posts.tsx
// src/components/Posts.tsx

import { FileUploader } from '@aws-amplify/ui-react-storage';
Revert your createPost to the original function then add a function parameter path:
// src/components/Posts.tsx

const createPost = async (path: string) => {
  const caption = window.prompt("Caption");
  if (!caption) return;

  const newPost = await client.models.Post.create({
    caption,
    email: user.signInDetails?.loginId,
    userId: user.userId,
    date: new Date().toLocaleString(),
    imagePath: path,
  })

  console.log("Create Post Result: ", newPost)
}
<FileUploader/> component
// src/components/Posts.tsx

<FileUploader
  path={({ identityId }) => `post-pictures/${identityId}/${Date.now()}-`}
  maxFileCount={1}
/>
Now you can see a File Uploader UI in your application
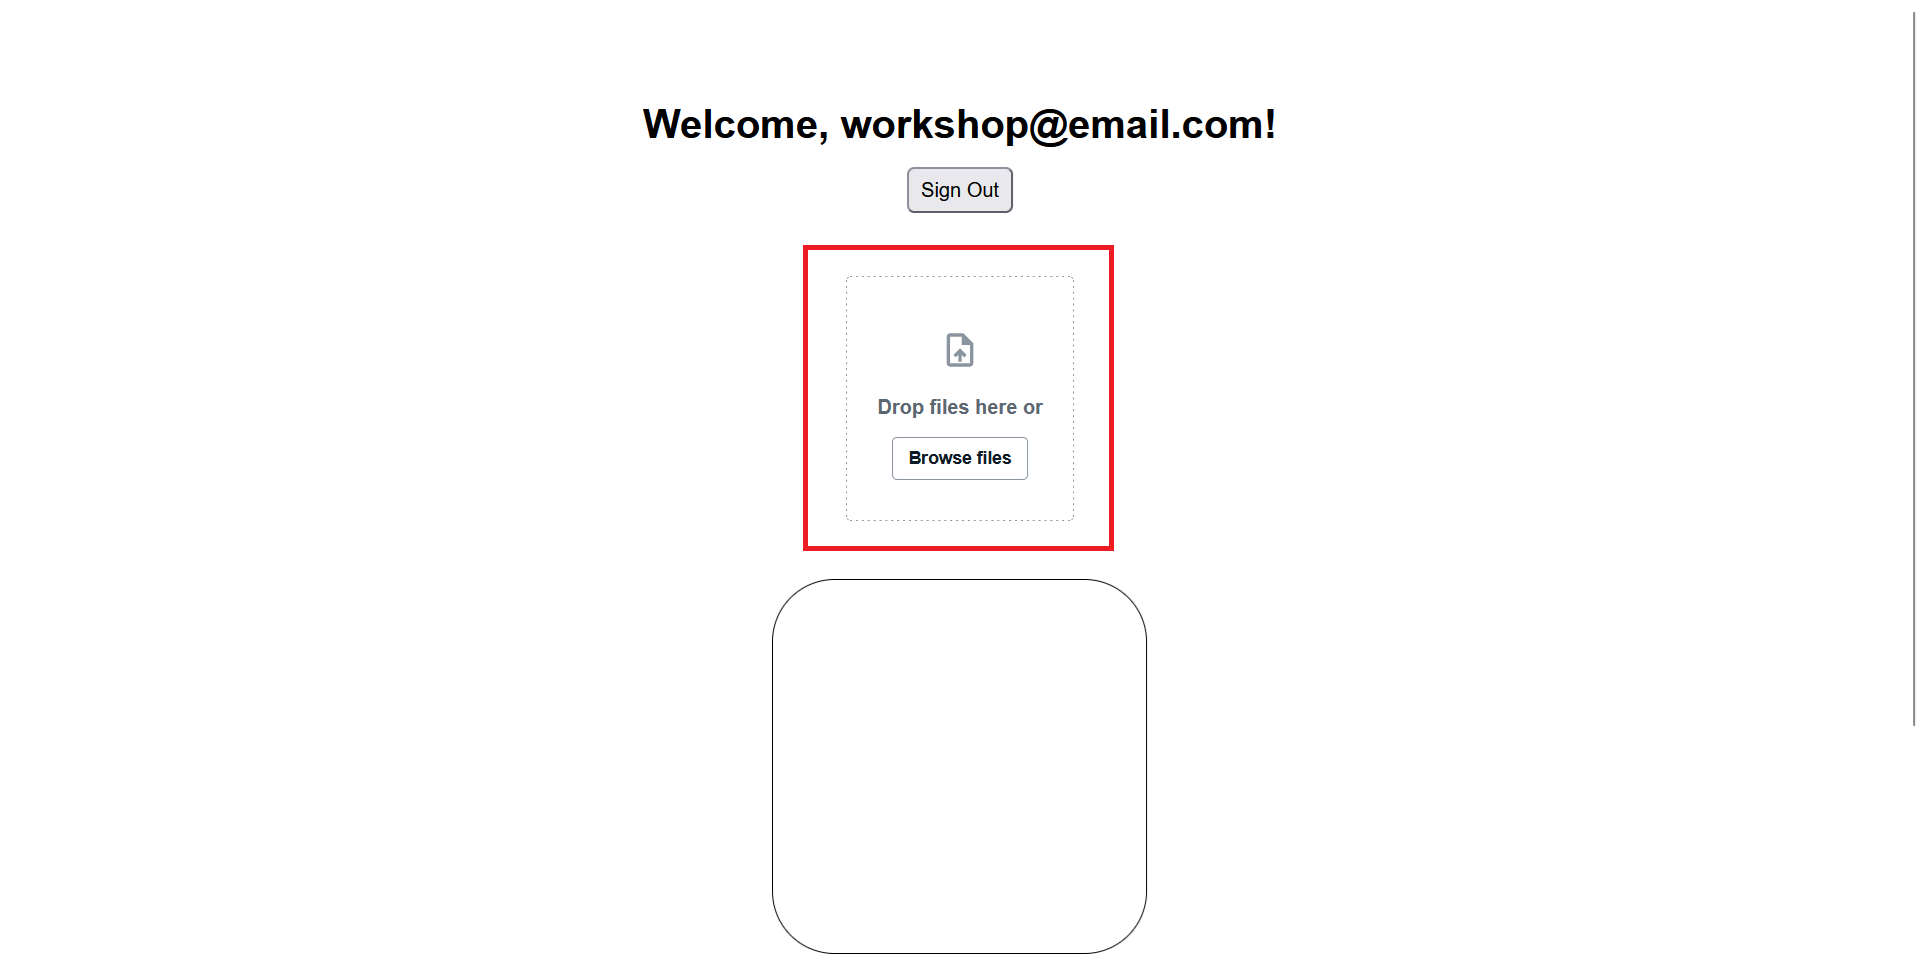
Since we don't have a button to call createPost anymore, add it to the component's onUploadSuccess attribute instead
// src/components/Posts.tsx

<FileUploader
  ...
  onUploadSuccess={({ key }) => key && createPost(key)}
/>
We add a guard condition
key &&to ensure that thekeyexists before running the function
The key refers to the file.key which holds the S3 path of the uploaded file. Effectively saving the path to our Post
You could also add file upload limits such as acceptedFileTypes and maxFileSize
// src/components/Posts.tsx

<FileUploader
  ...
  acceptedFileTypes={['.jpg', '.gif', '.png']}
  maxFileSize={5000000} // In bytes
/>
The above attributes limit our file uploads to .jpg, .gif, and .png. It also throws an error when uploading a file larger than the maxFileSize
Now we can upload files similarly to using uploadData with less manual scripting
Preview Uploaded Files in S3 Console
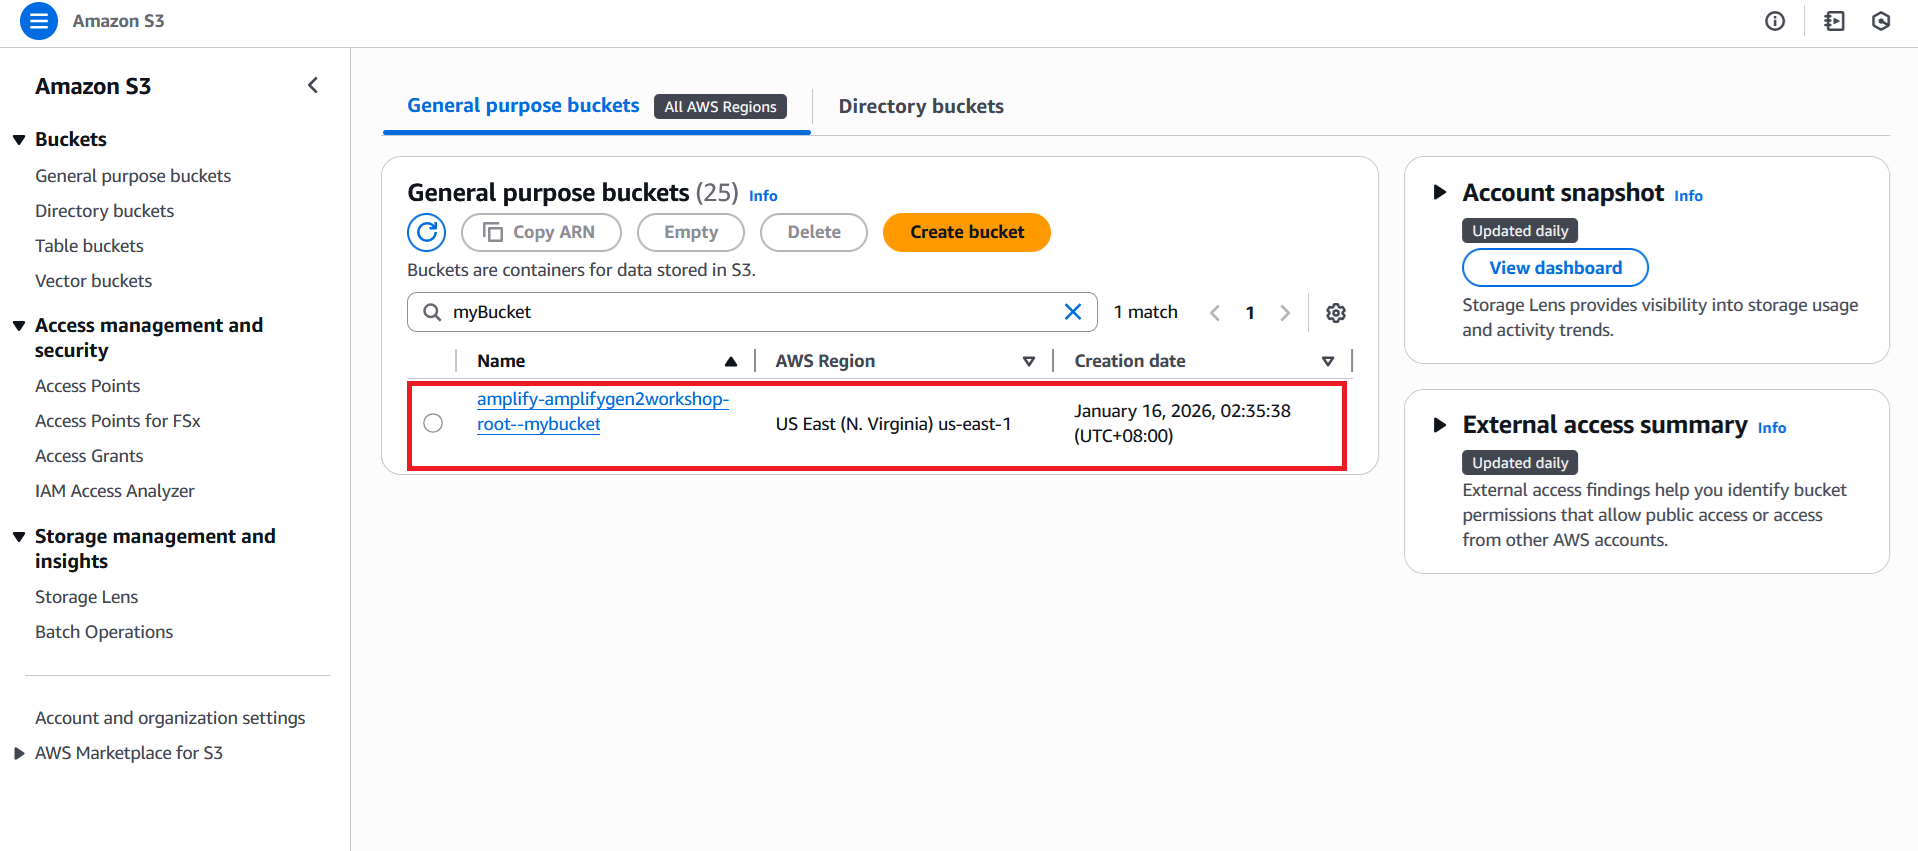
Step 1: Access S3 Console
- Navigate to AWS Console
- Type "S3" in the services search bar
- Click on "S3" to access the storage service
Step 2: Find Your Storage Bucket
- Look for a bucket with name like
amplify-[app-name]-[environment]-[random-string]-bucket - Click to open your Amplify storage bucket
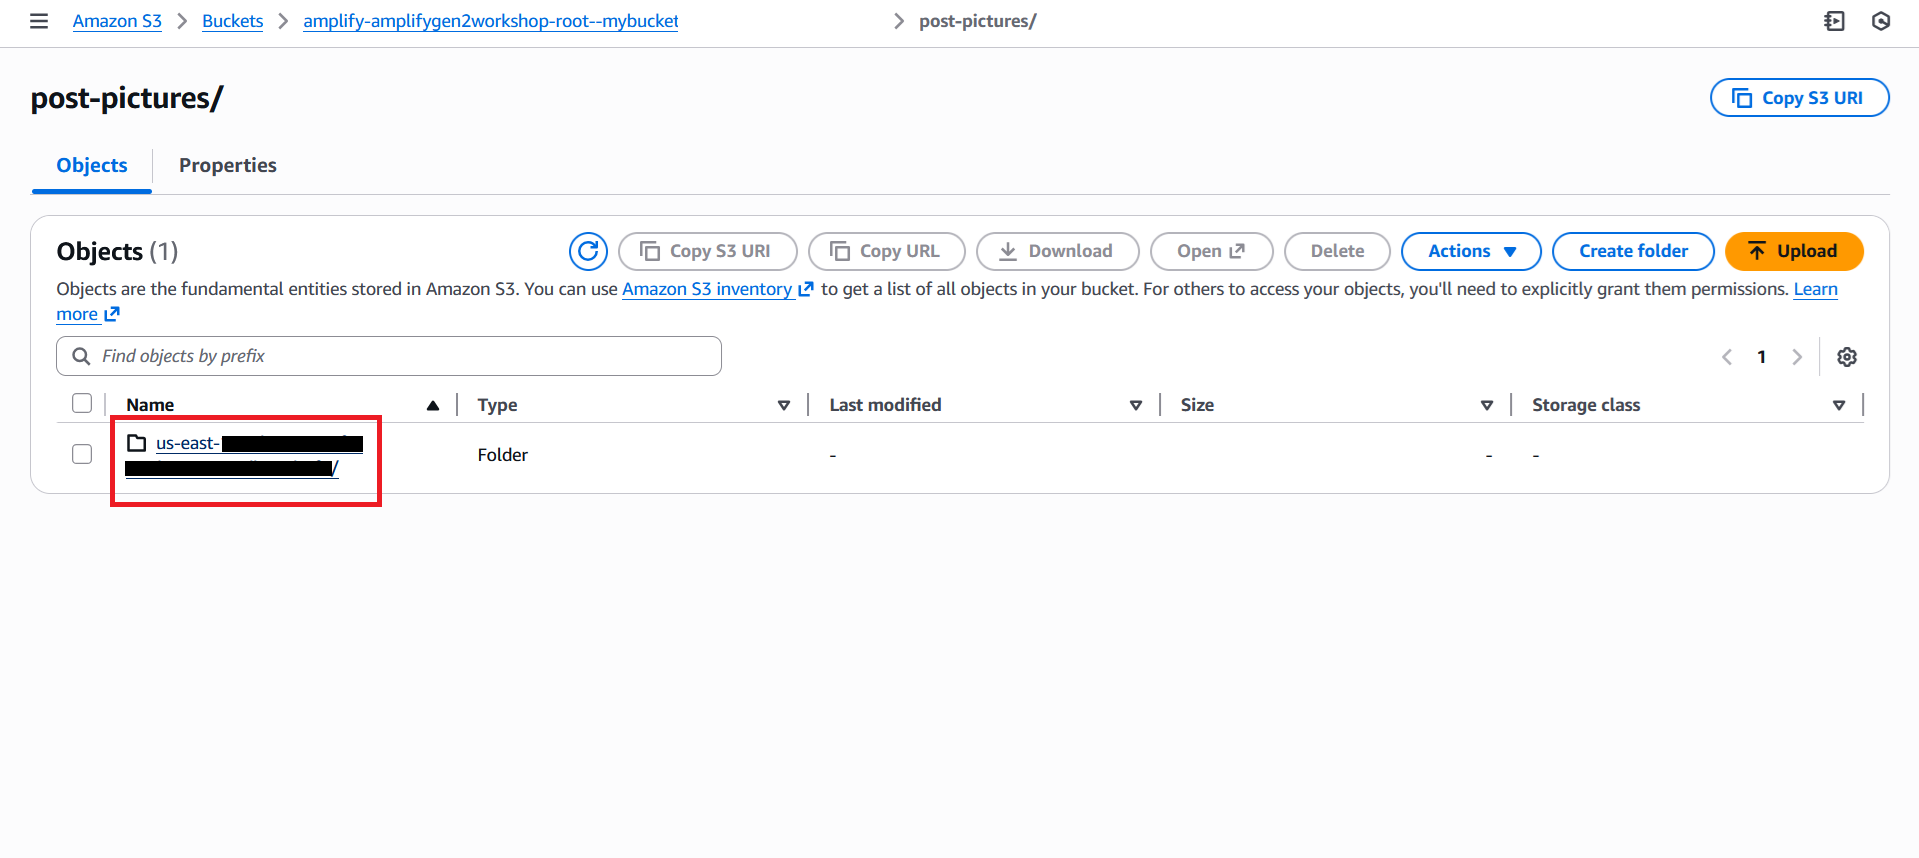
Step 3: Navigate to Uploaded Files
- Navigate to
post-pictures/folder inside your bucket
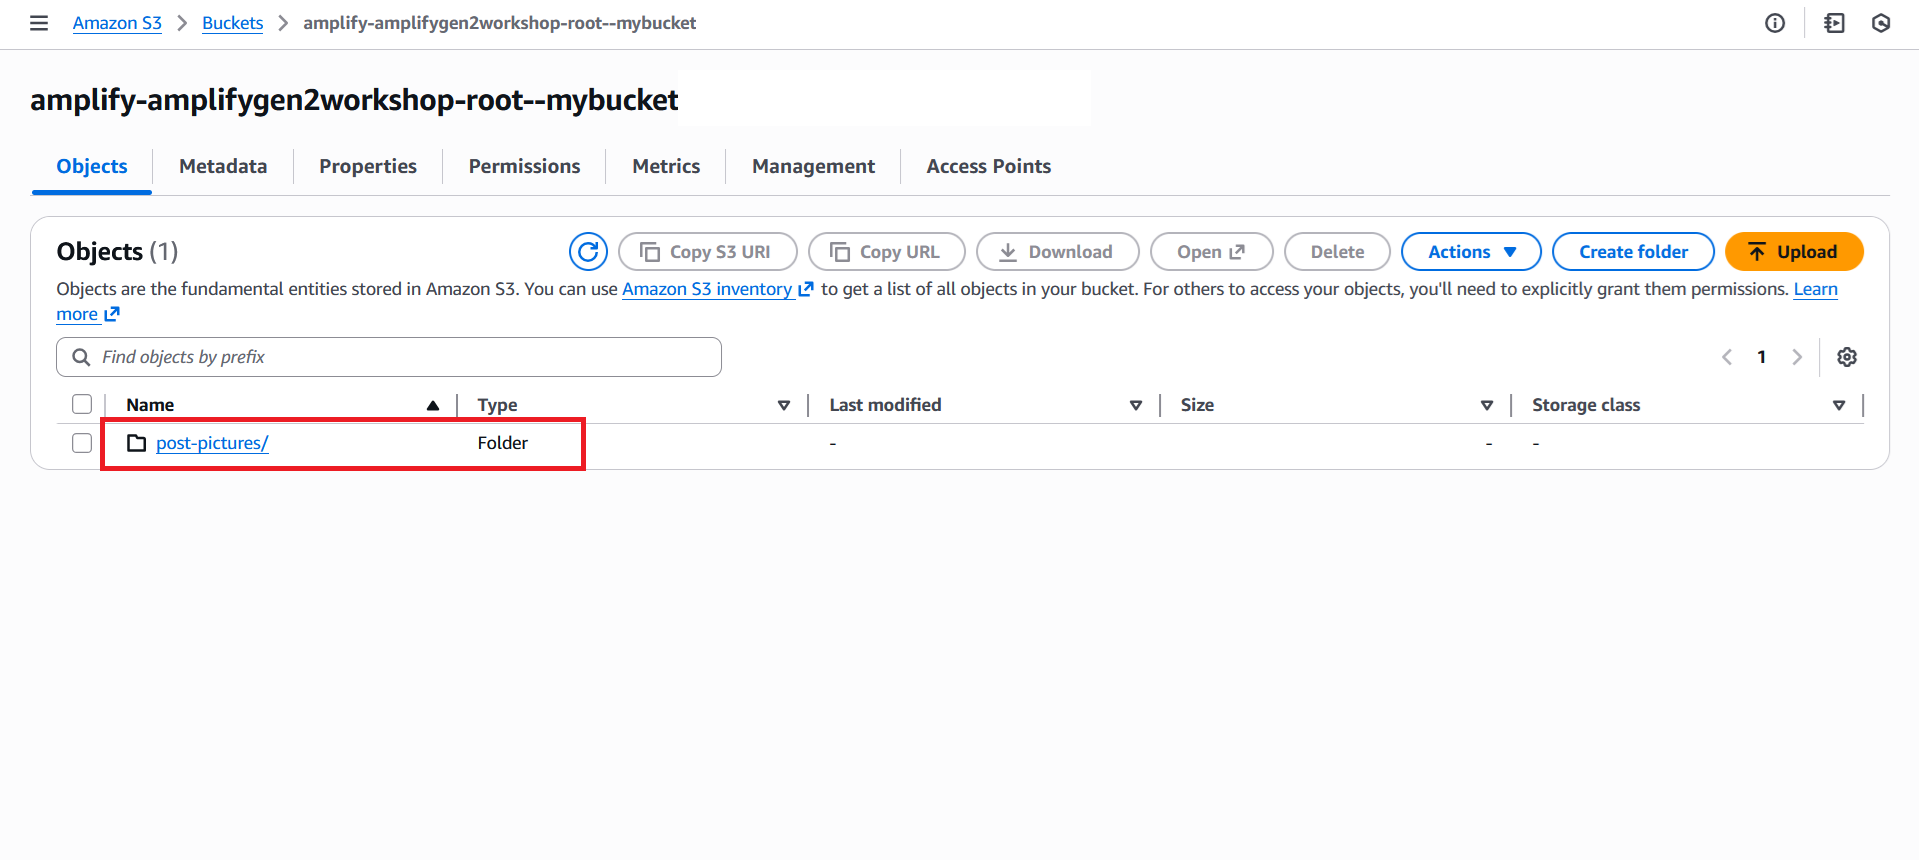
- Look for a folder named with your Cognito Identity ID
Step 4: View Your Uploaded Images
-
You'll see your uploaded images with names like:
1234567890-image.jpg1234567891-photo.png

-
Preview Images:
- Click on any image file name
- You can see file details like size, upload date, and storage class
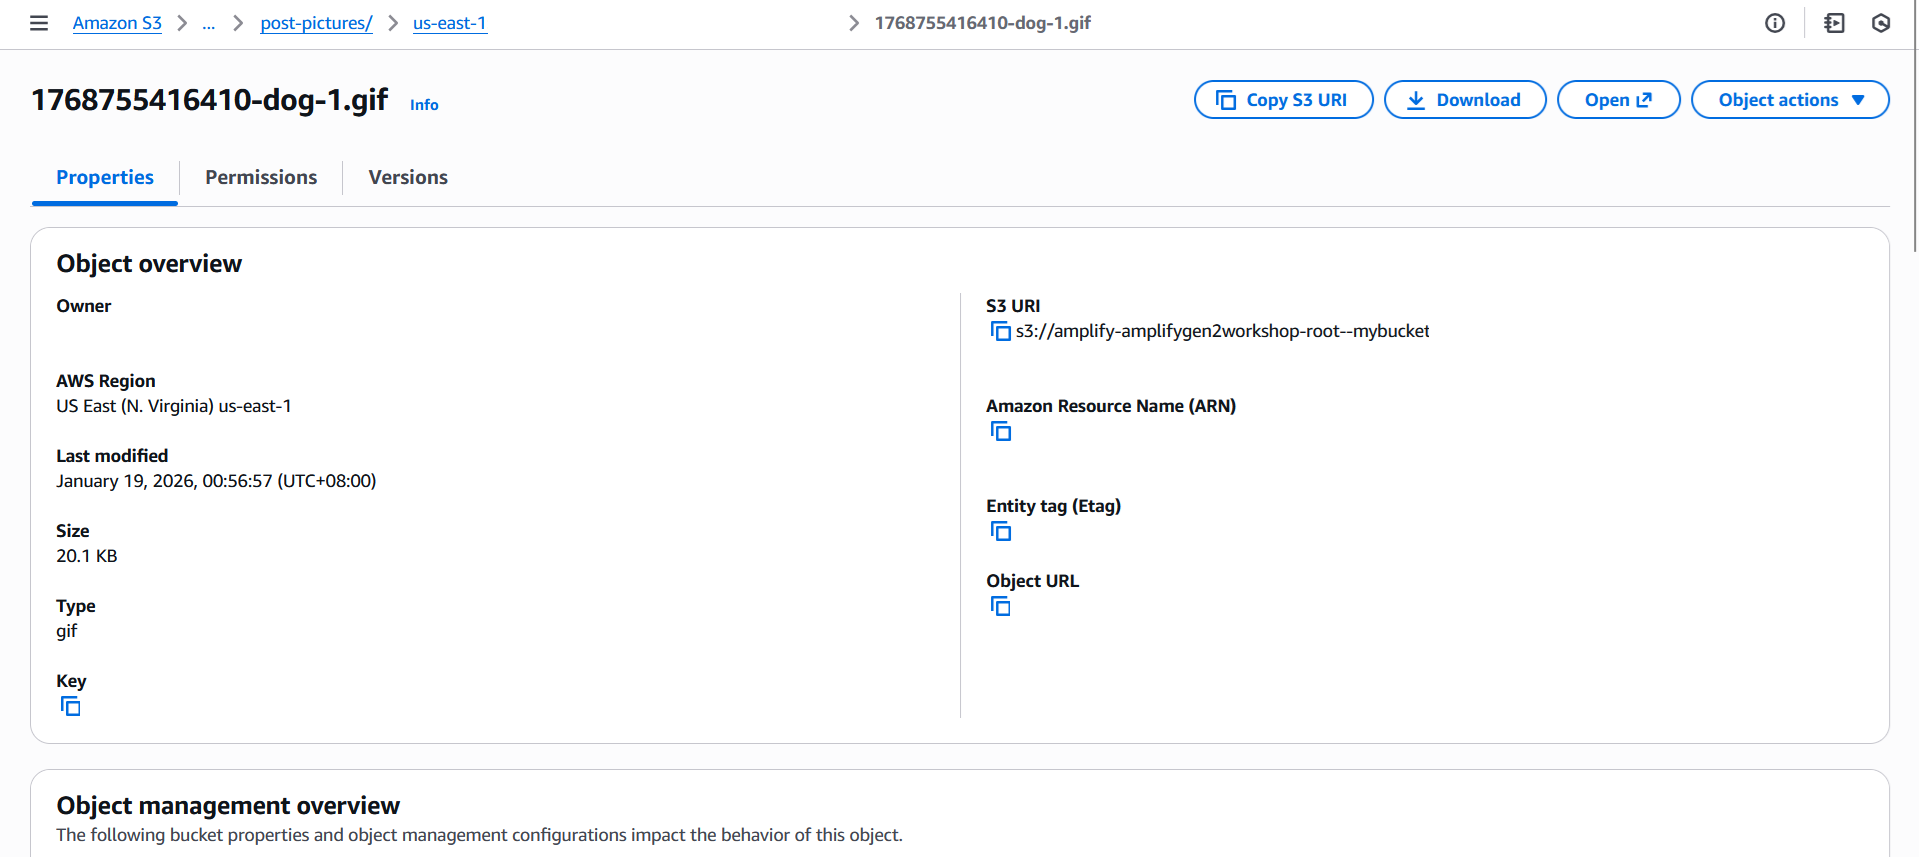
- Select "Open" or "Download" to view the image